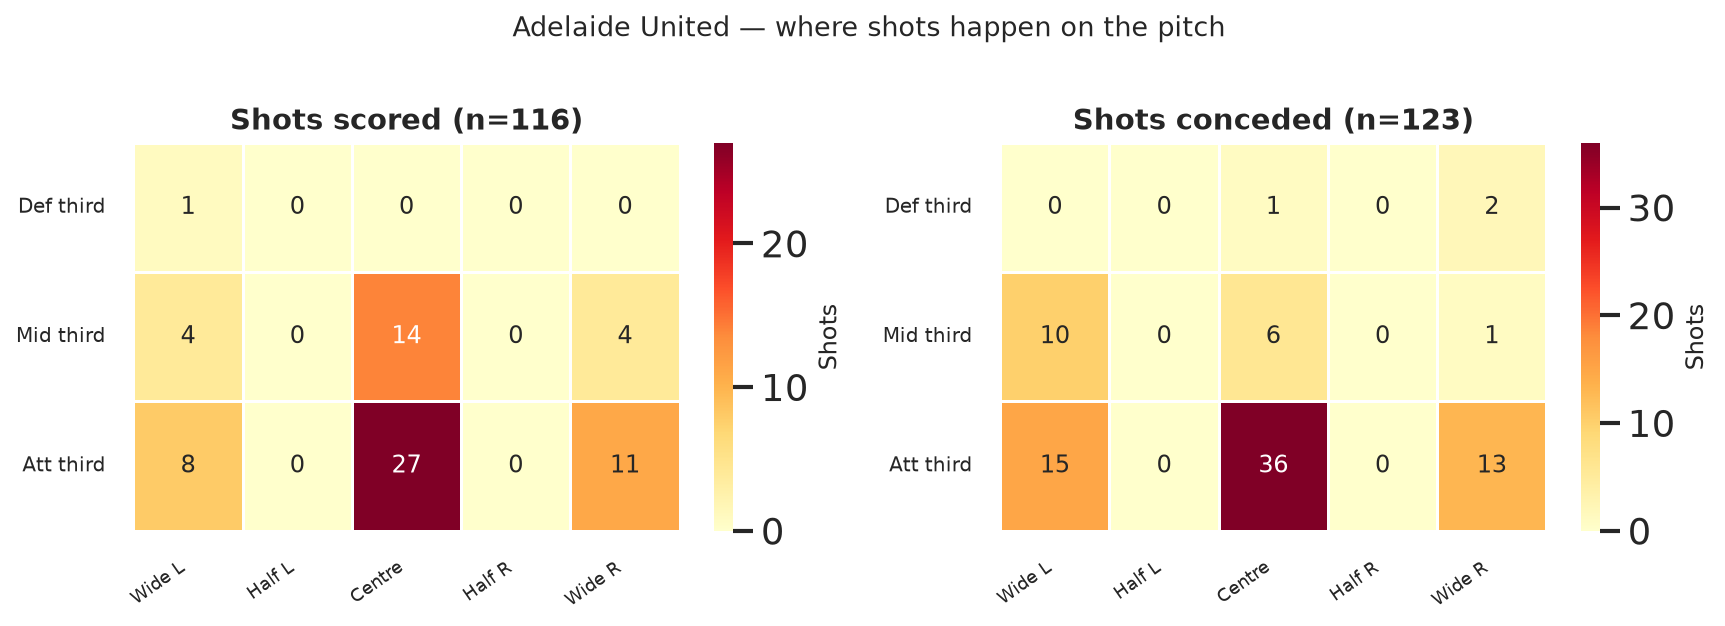
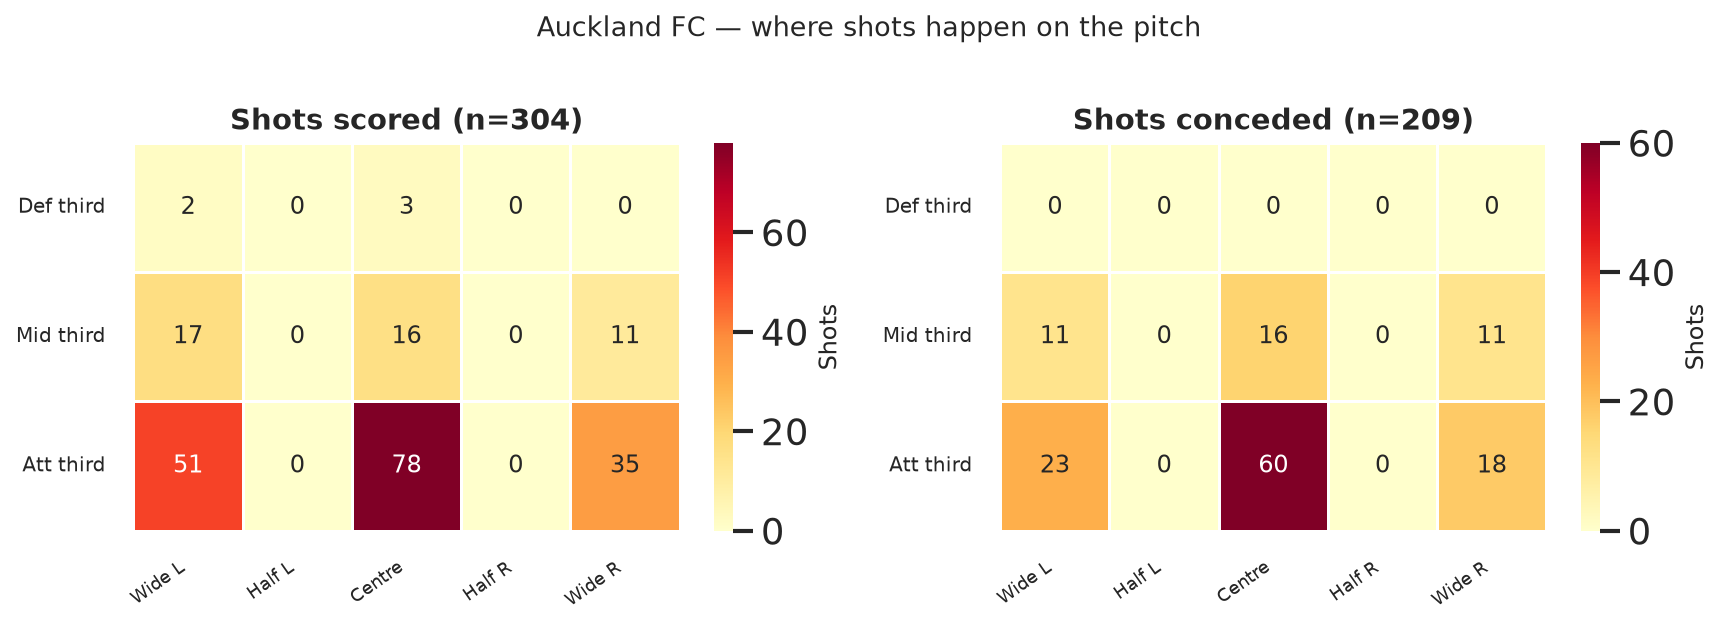
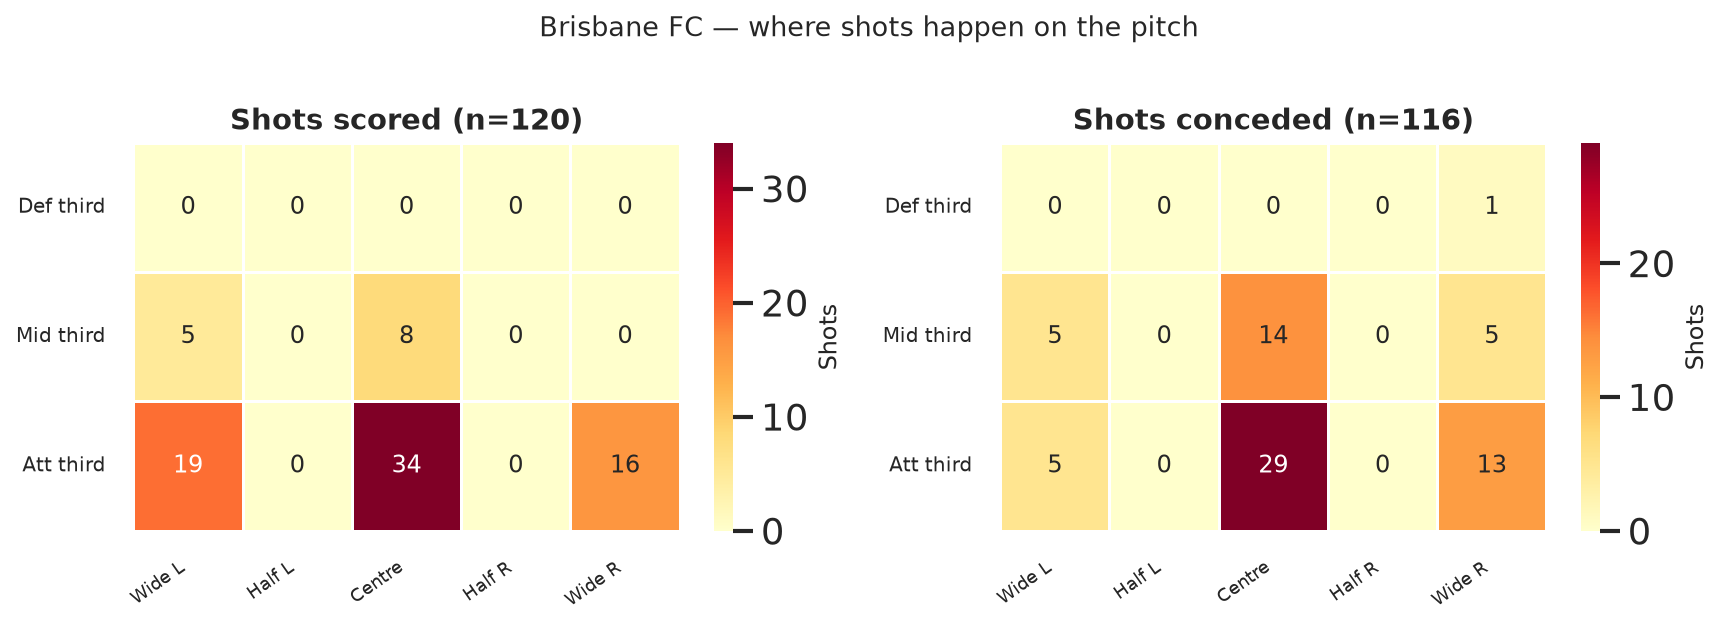
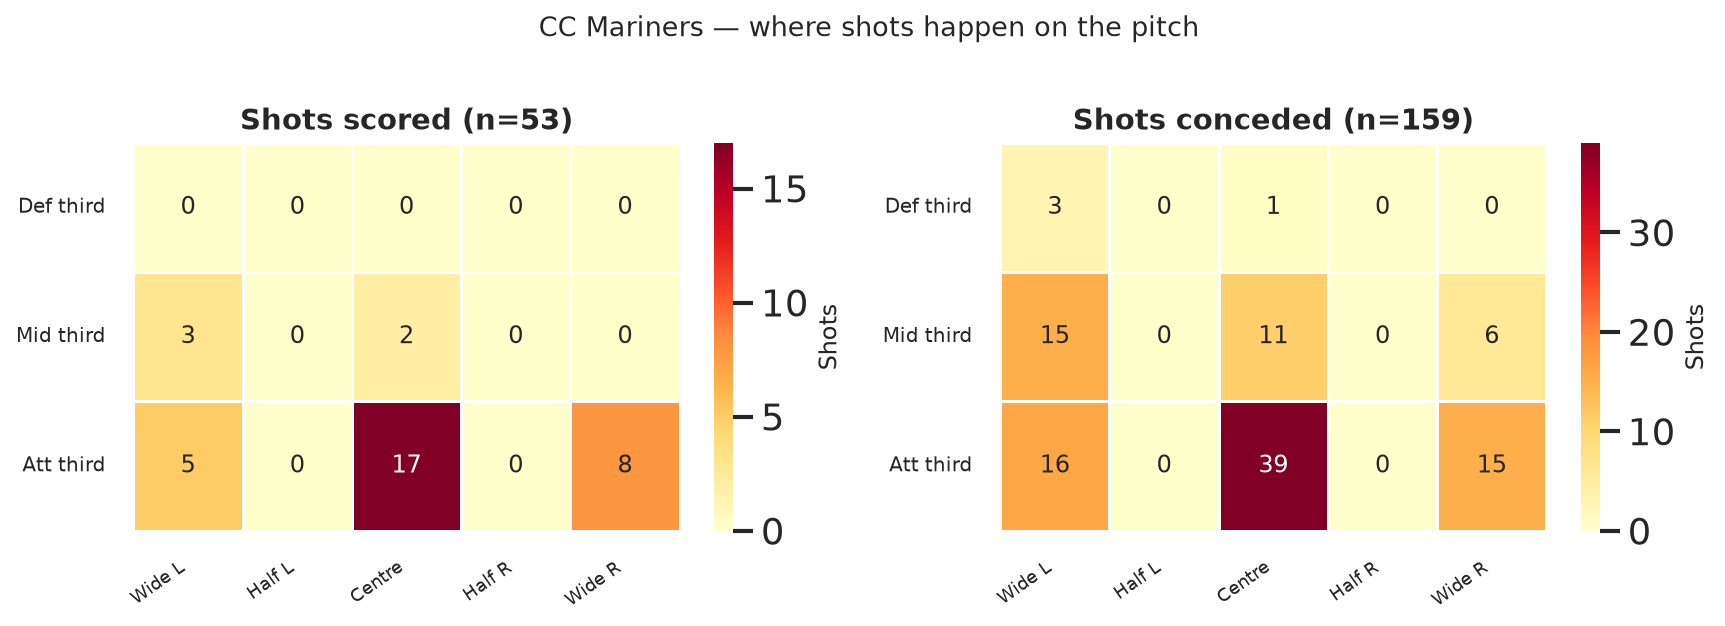
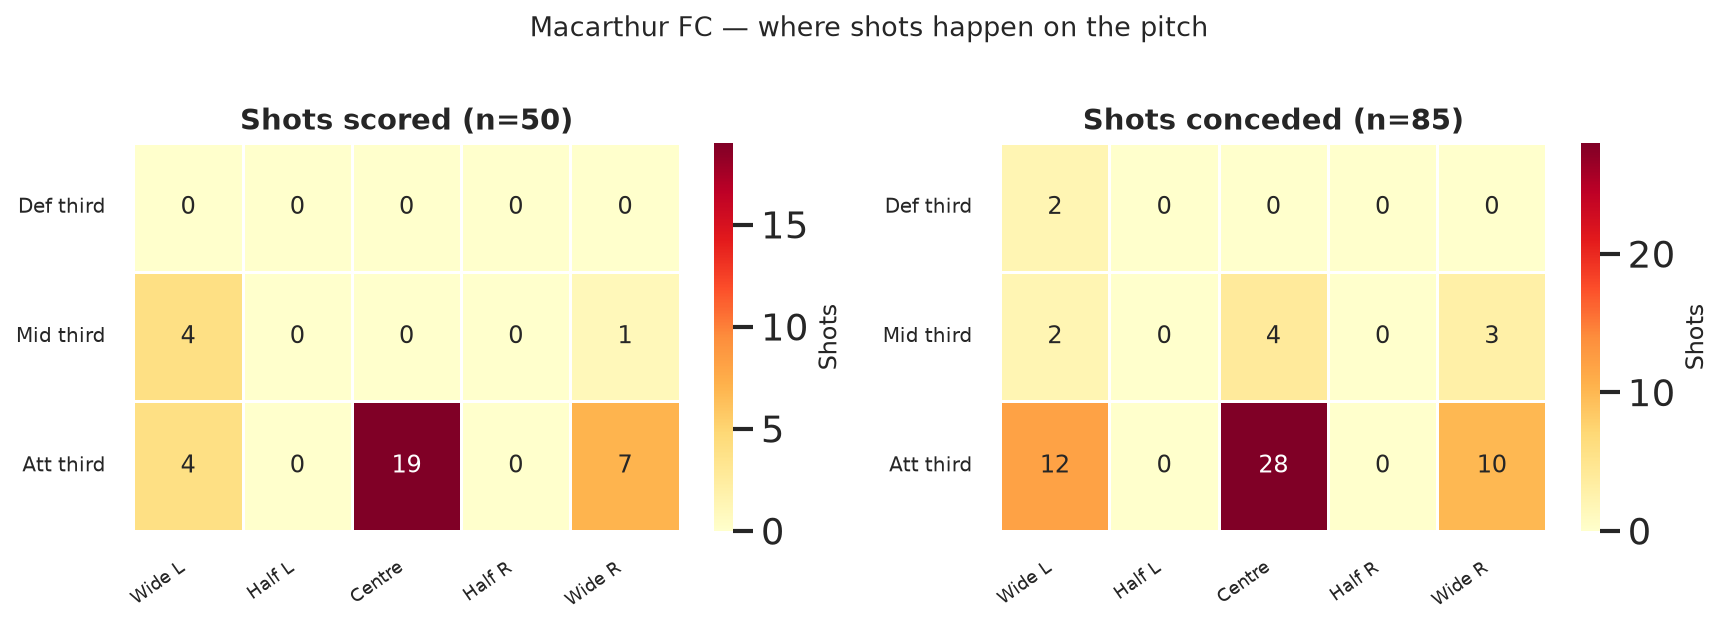
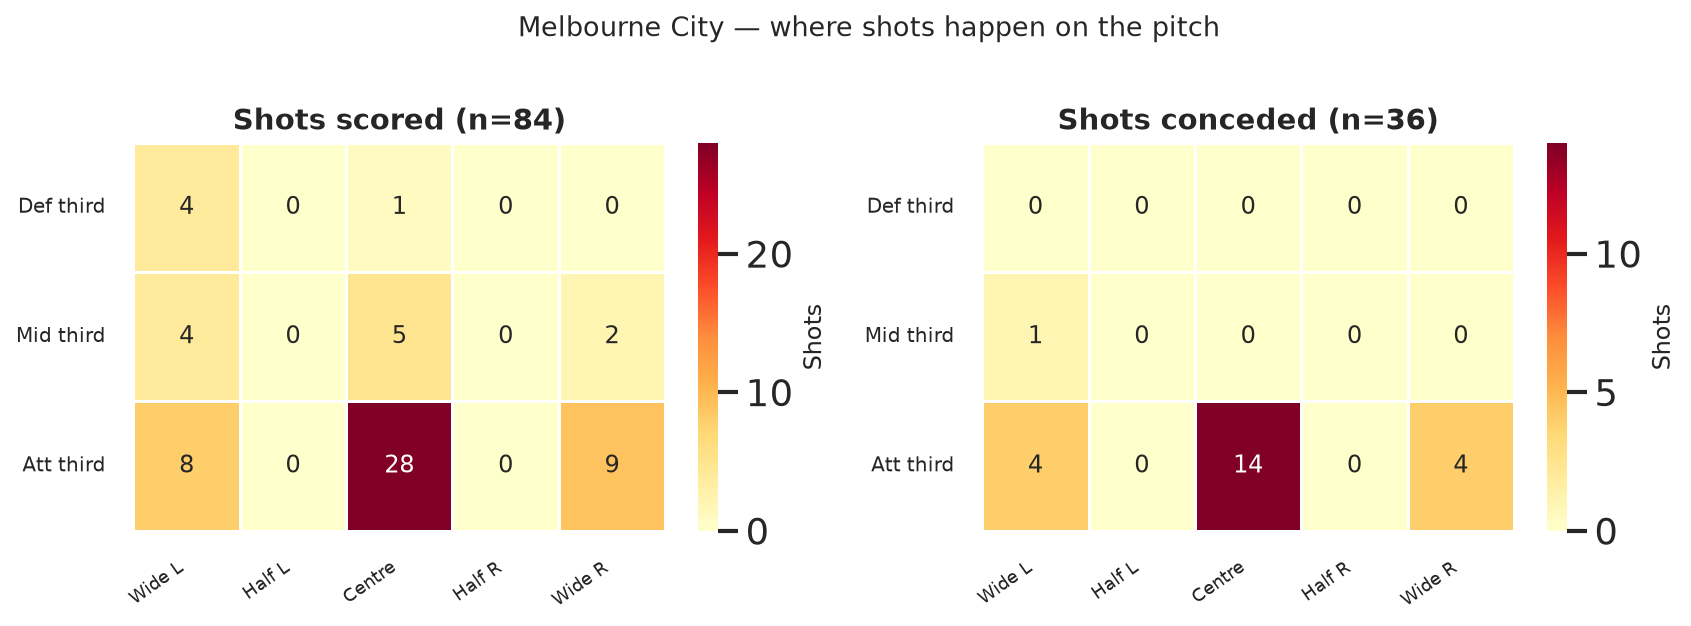
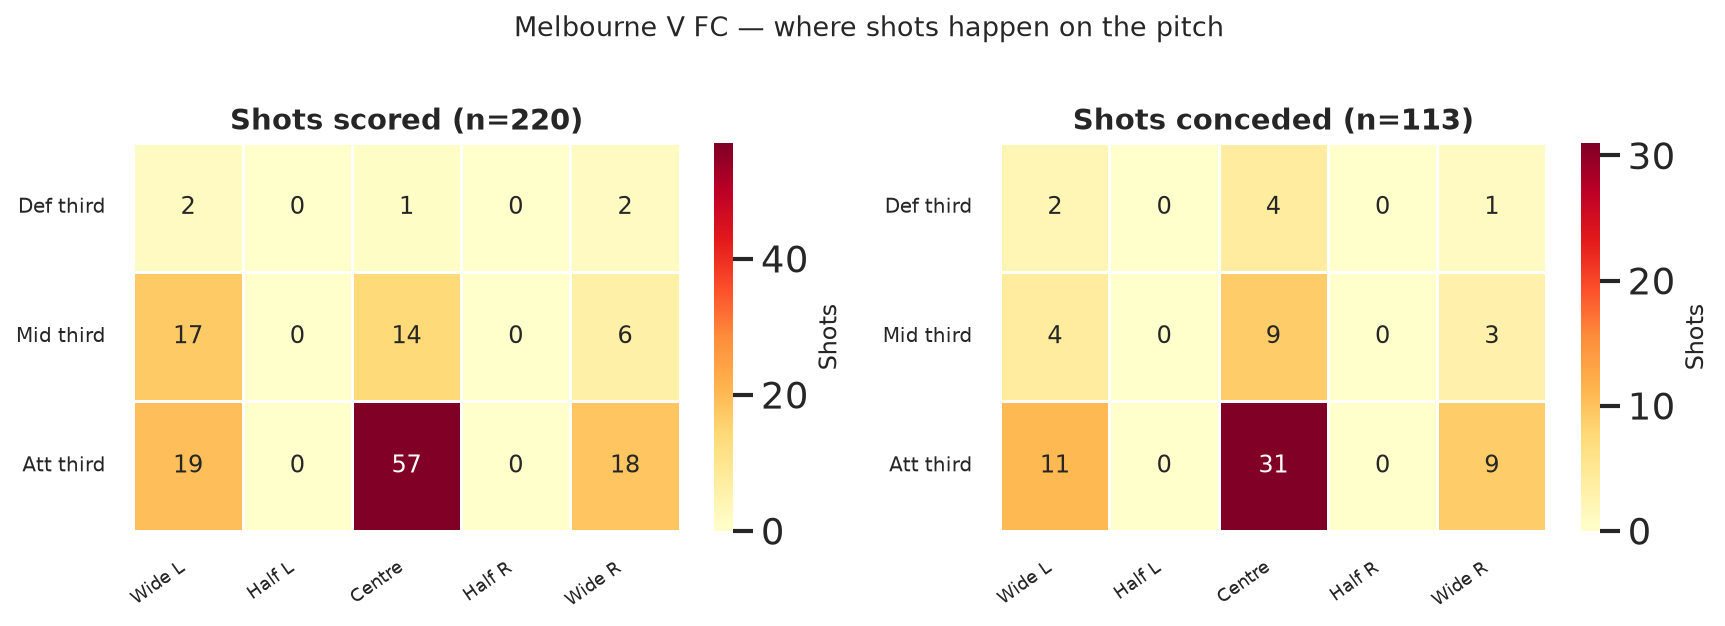
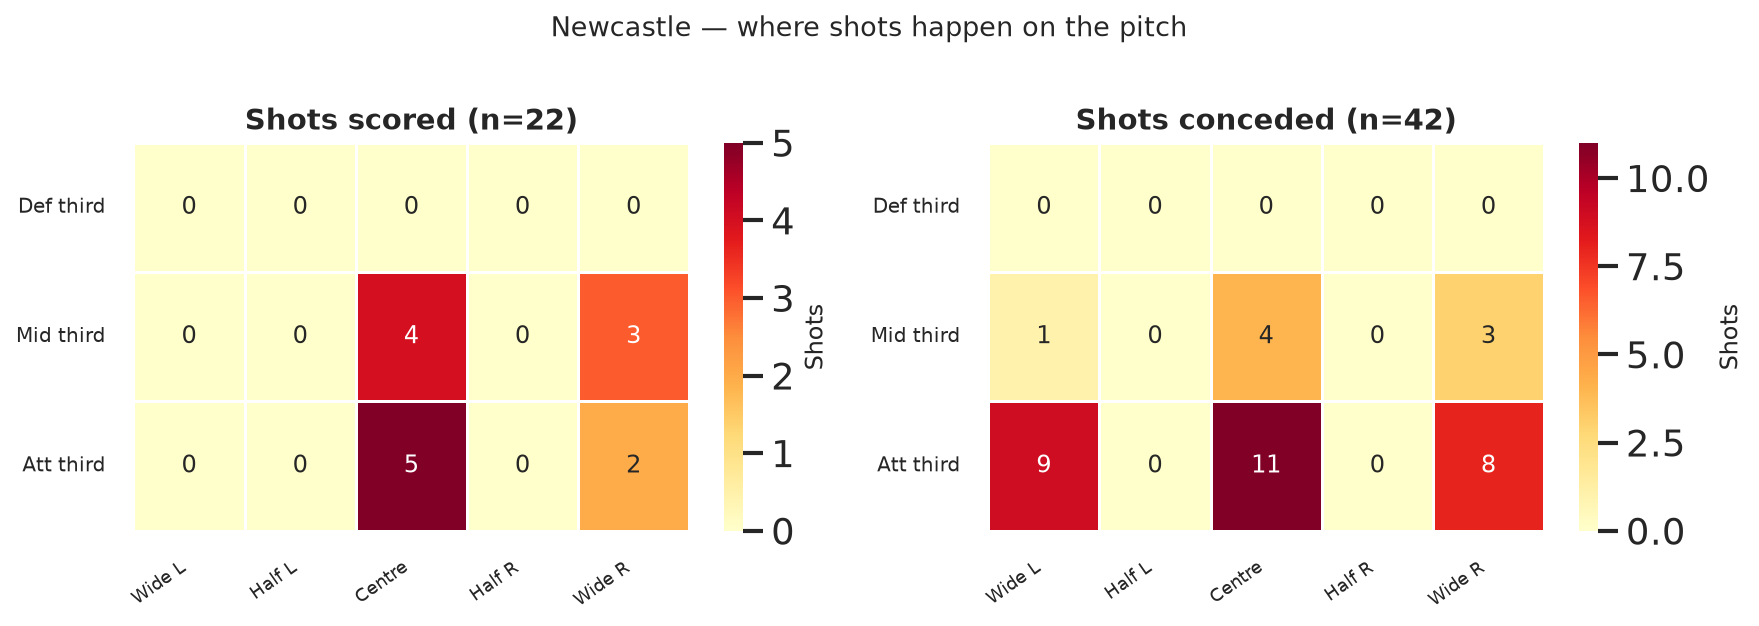
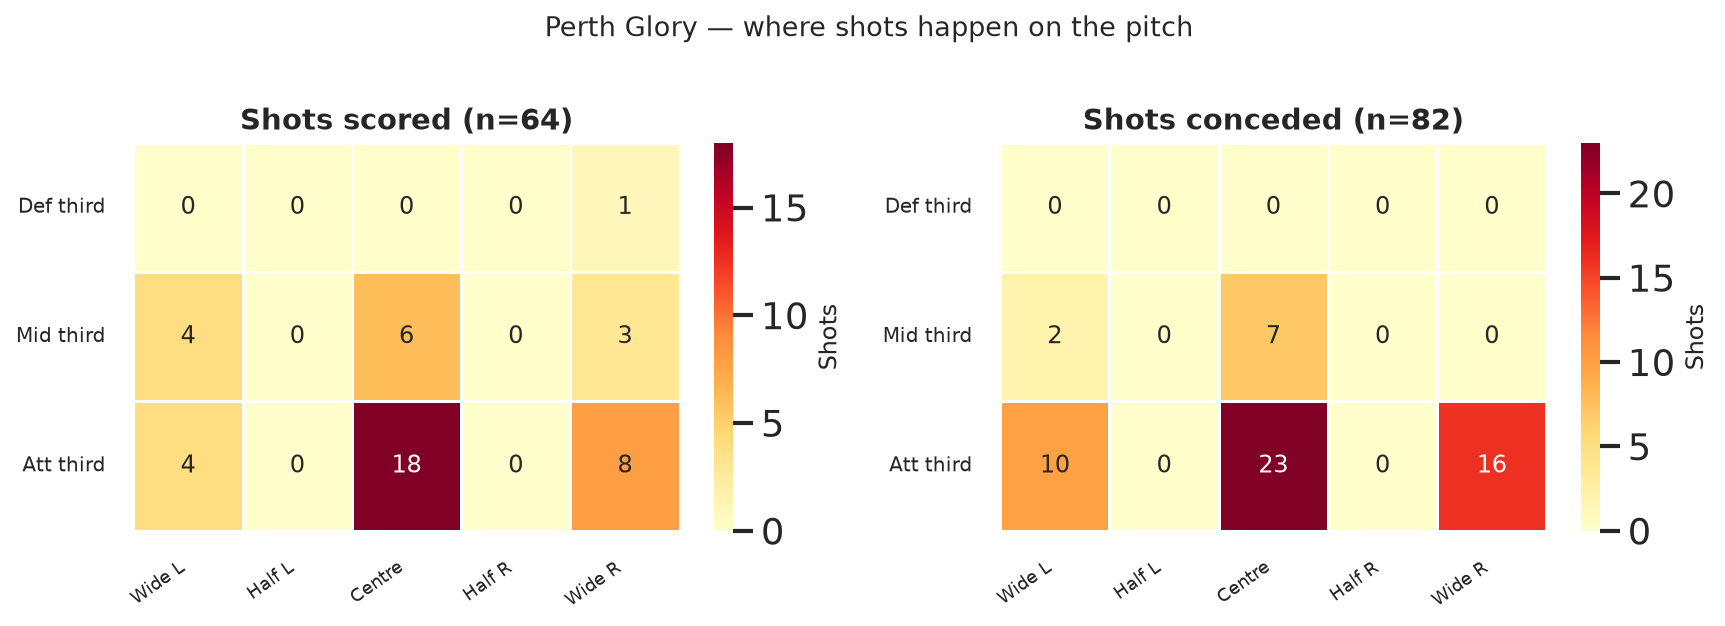
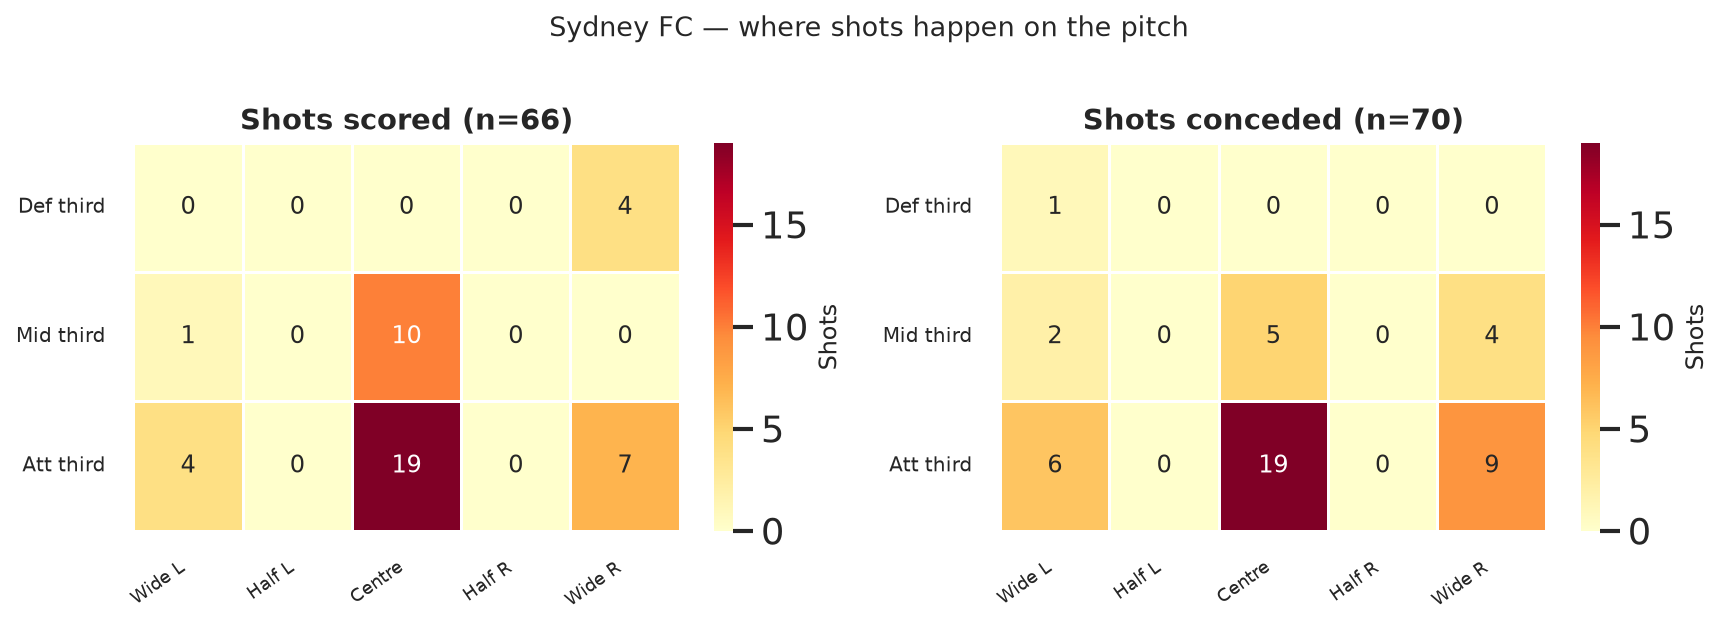
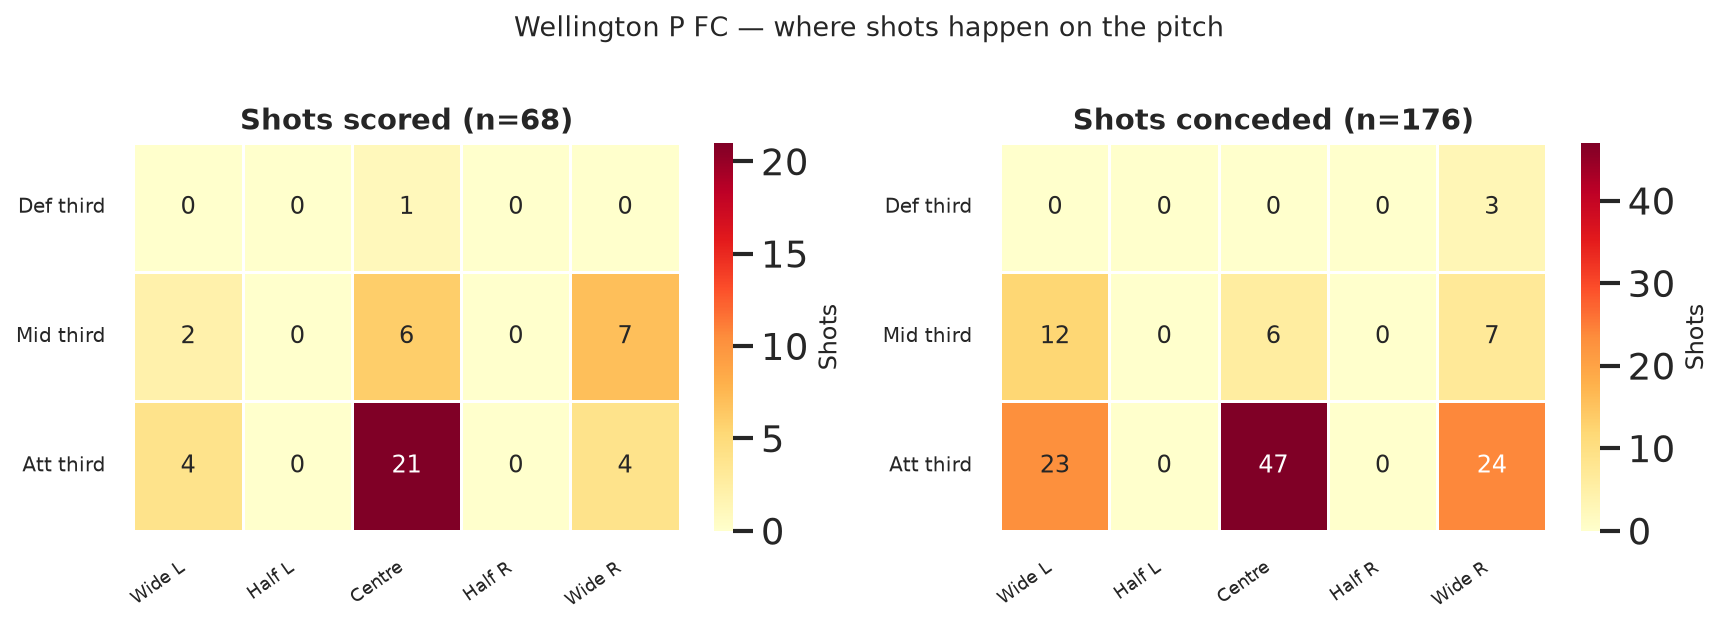
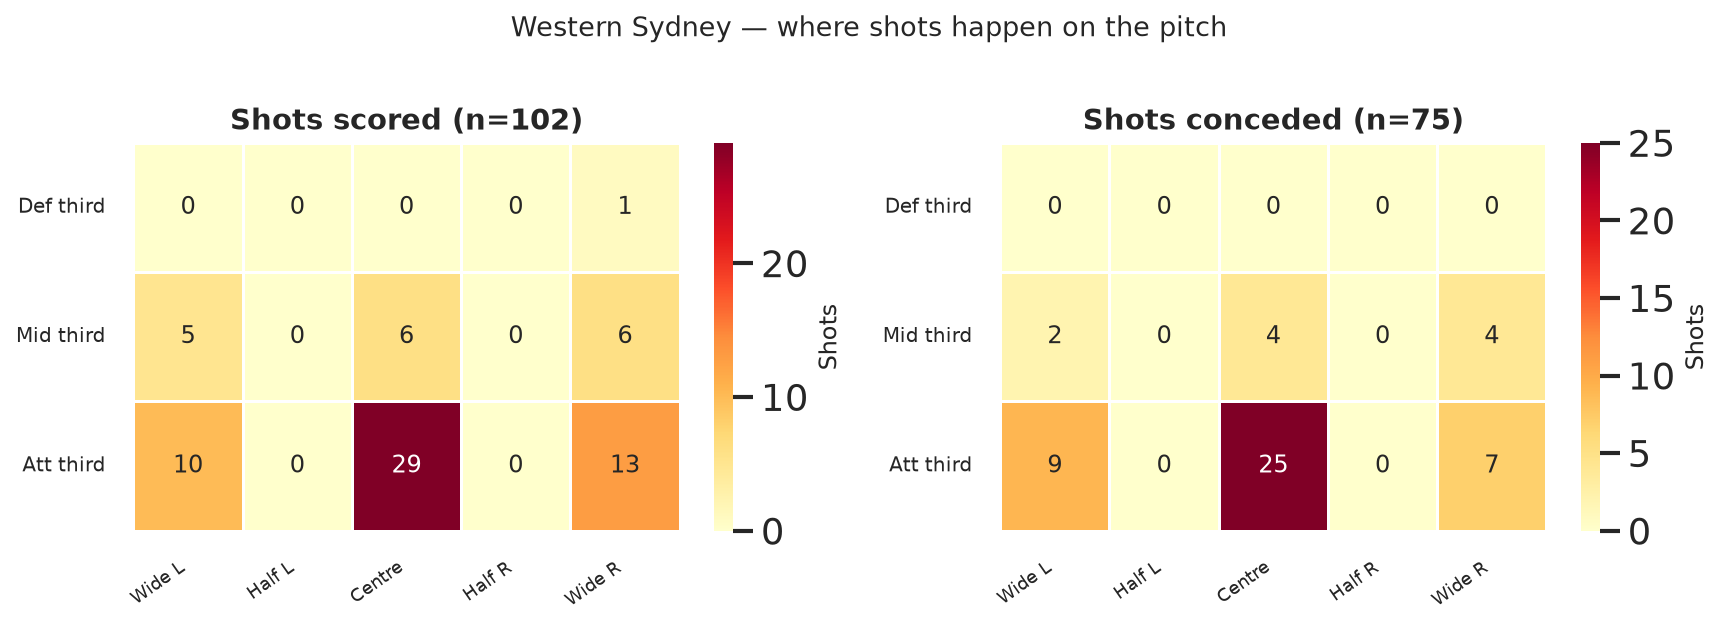
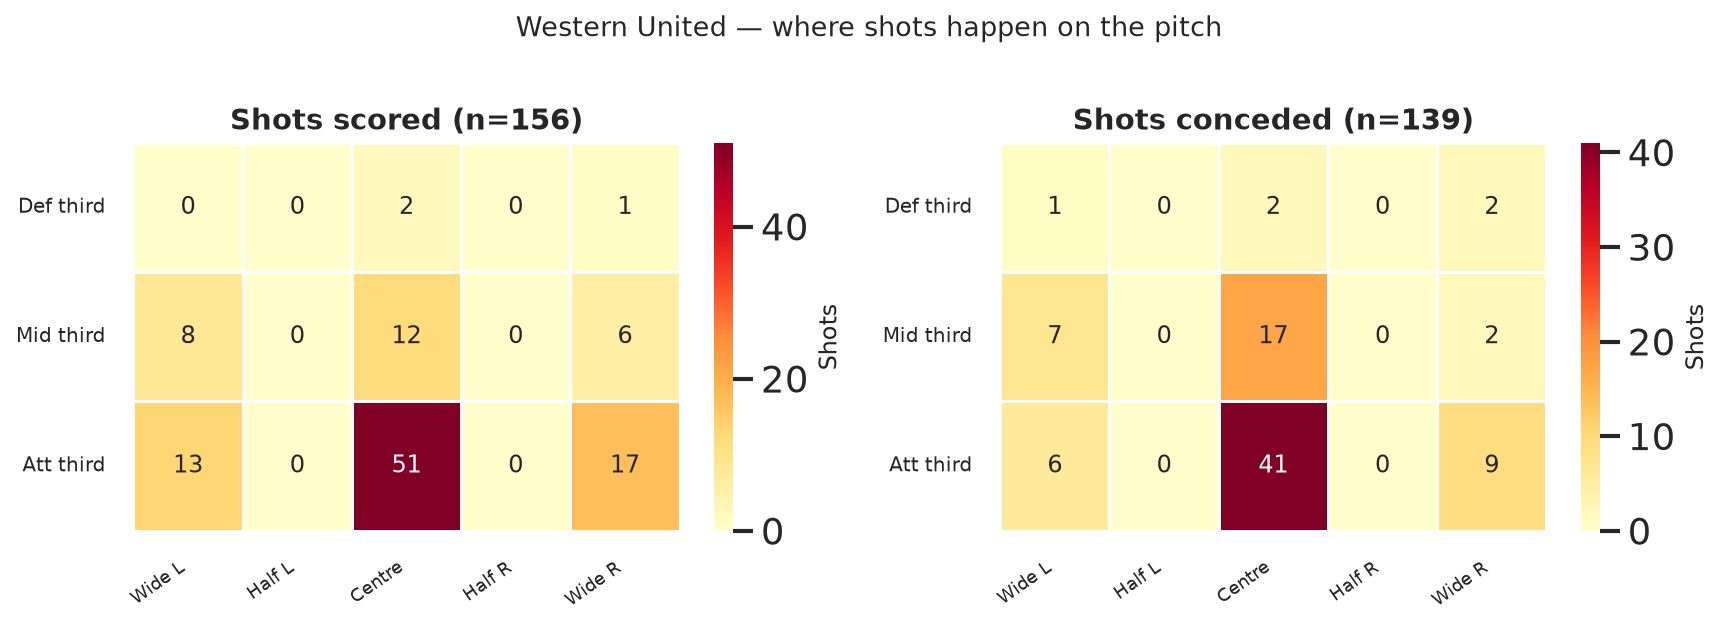
League averages hide shape: each club has its own shot map (scored vs conceded). Cells count where the ball was when the shot started.
Adelaide United — left: where they shoot; right: where opponents shoot against them.Auckland FC — left: where they shoot; right: where opponents shoot against them.Brisbane FC — left: where they shoot; right: where opponents shoot against them.CC Mariners — left: where they shoot; right: where opponents shoot against them.Macarthur FC — left: where they shoot; right: where opponents shoot against them.Melbourne City — left: where they shoot; right: where opponents shoot against them.Melbourne V FC — left: where they shoot; right: where opponents shoot against them.Newcastle — left: where they shoot; right: where opponents shoot against them.Perth Glory — left: where they shoot; right: where opponents shoot against them.Sydney FC — left: where they shoot; right: where opponents shoot against them.Wellington P FC — left: where they shoot; right: where opponents shoot against them.Western Sydney — left: where they shoot; right: where opponents shoot against them.Western United — left: where they shoot; right: where opponents shoot against them.